
How to Find Your Listening Position
This article is all about finding your listening position in your room: Why it matters, how to find it, and why it’s the first step when setting up your room, whether it’s a studio, listening room, or home theater.
Let's jump right in!
Why do we start with the listening position?

It’s the easiest step you can take:
to make sure you start on the right foot to make your room sound great - in just a few minutes and with no fancy equipment required, you can find your listening position.It sets you up for success with a solid foundation:
If you put your listening position in an unbalanced spot in your room, you’ll never be able to accurately hear your music/sound source and the true capabilities of your speakers and equipmentIt doesn’t change as you move your speakers or acoustically treat your room:
You can find your listening position regardless of whether or not you have any acoustic treatment, you’re changing speakers soon, or you’re adding a sub, etc.
Why it matters:
By finding your ideal listening position, you can be confident that you are sitting in the low-end sweet spot of your room. This means you are sitting in the one spot in your room where low frequencies are the most balanced.
In a critical listening environment, you want accuracy, balance, impact, and clarity in the low end. Finding the most even and balanced listening position in the room reduces the impact of room modes and the resulting resonances, peaks, and dips as much as possible before we even begin placing speakers or acoustically treating the room. We want to work with the room, not against it! Otherwise, the room will always win.
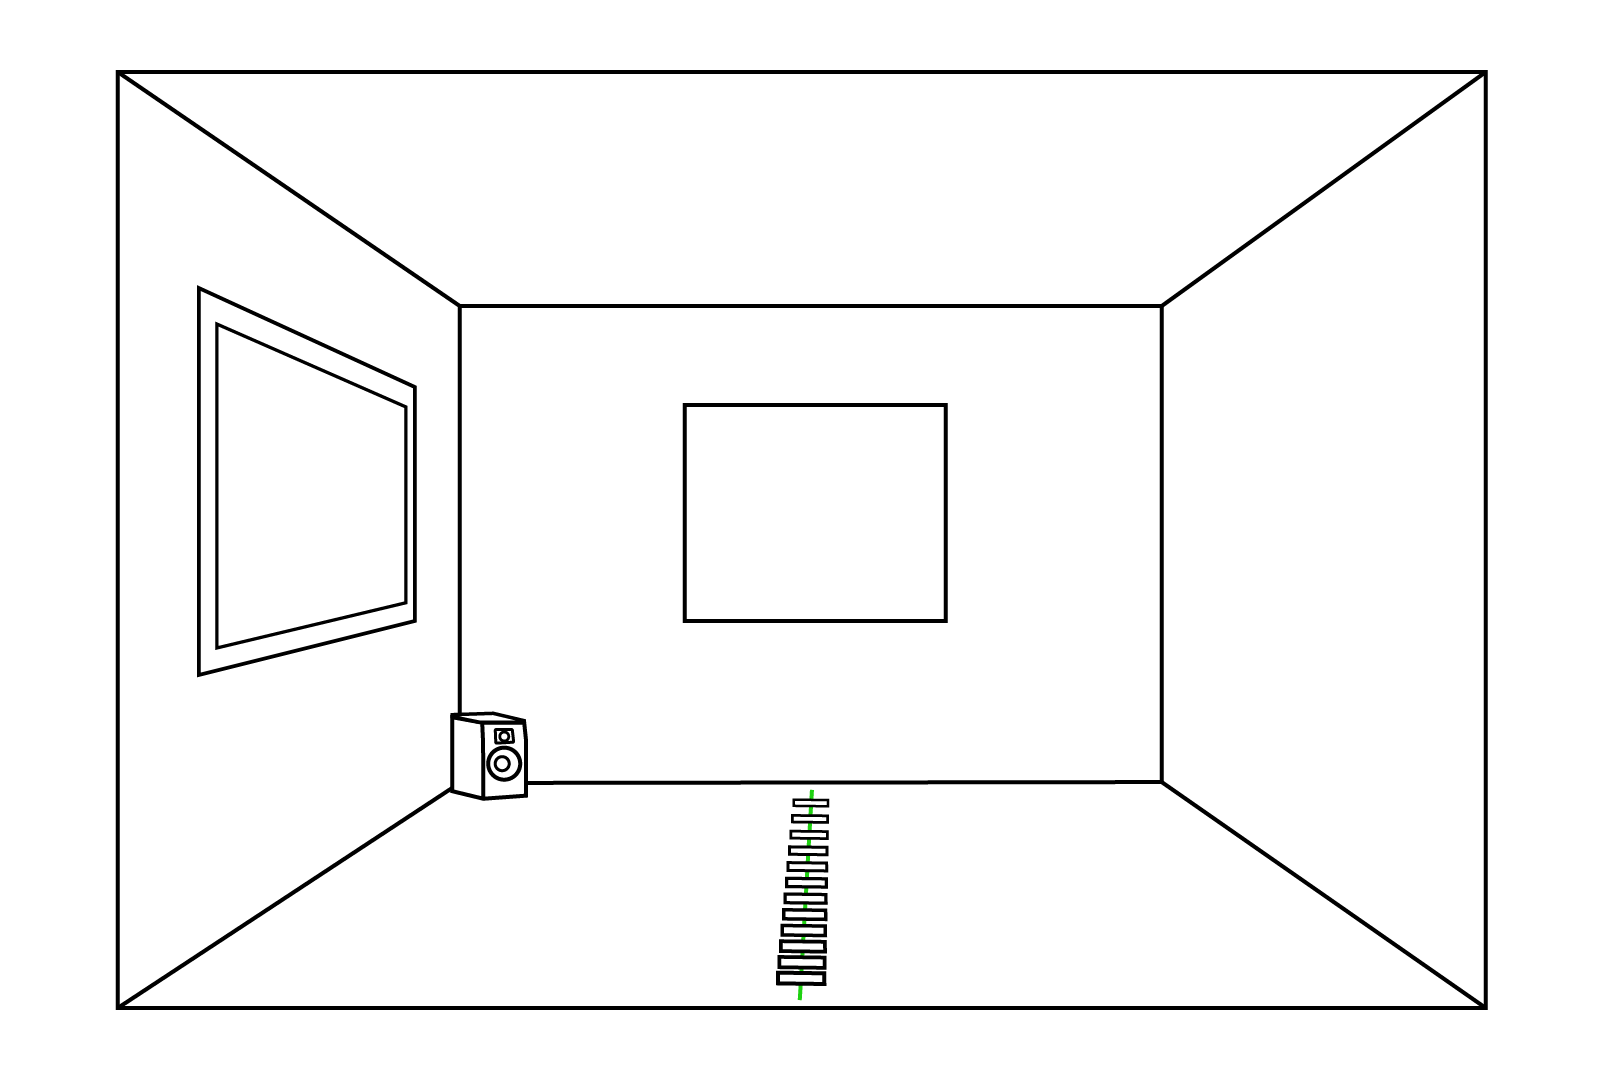
See the impact:

Above are four listening position locations we tested in our demo room, represented by the green, orange, red, and blue points.

Here are the frequency response graphs for those same four listening positions, plotted in REW from 20Hz to 700Hz, covering the low to low-mid frequencies. Notice how the green position offers the most balanced response, particularly between 40Hz and 80Hz. For example, if you compare the red and green positions, you'll see an 8dB spike around 72Hz on the red curve. You can also spot a major null on the blue curve around 56Hz. These big shifts in frequency response can seriously impact what you hear. Whether you are using your ears or REW to find your ideal listening position, aim for the spot with the smoothest response and the least fluctuation between peaks and nulls!
Do I need to take acoustic room measurements to find my listening position?
The short answer is no. When it comes to finding the low-end sweet spot in your room, your ears are an excellent tool. You’ll be surprised how accurate they are with a simple listening test!
Of course, if you want to take room measurements to confirm you’ve found the perfect spot, you absolutely can. If you need any help getting started with acoustic measurements or REW, check out our videos here and here.
What are room modes?
Let’s take a quick second to discuss room modes.
Room modes are resonances at specific frequencies in a room, excited by an acoustic source such as a loudspeaker. These resonant frequencies are usually in the 20 Hz to 200 Hz region. Room modes can cause certain frequencies to be amplified or attenuated in specific areas of the room. This can result in "boominess" at some frequencies and a lack of bass in others.
You might have noticed room modes if you’ve ever tried mixing in a small untreated room, and a certain frequency in the low mids is particularly jumping out. You might overcorrect by turning that frequency down in your mix EQ, and go out to your car or listen in your friend’s acoustically treated studio to find your mix sounds thin and weak! Identifying room modes is key to avoiding mix overcorrections or low-mid buildup during tracking.
(You can also use a room mode calculator like Amroc)
Keep reading to find out how you can use room modes to help you find the best listening position in your room!

What about the 38% percent rule?
Defining the 38% rule: the 38% rule states that the most balanced listening position will be 38% of your room's length from the front or back wall.
The 38% rule is more of a guideline - it’s a great starting point but not a hard and fast rule. It tells us mathematically where things are likely to be the most balanced in a rectangular room but it’s just that, a guideline. Each room is unique, and the math doesn’t account for odd shapes, closets, or any physical or aesthetic limitations regarding where your listening position can go!
So, let's jump right into finding your listening position!
When it comes to acoustics, optimizing the listening position in your room is by far the easiest, fastest, and cheapest way to make massive improvements to the balance, accuracy, and tonality of your speakers! Just follow these steps:
Step 1: Round up Your supplies
Here’s what you’ll need:
Post-It Notes
Painter’s Tape
Measuring Tape
String
A speaker
Rolling chair
Your 3 favorite reference tracks (with great low-end)
Step 2: Mark a line in the middle of your room
Measure your room and mark a line in the middle of your room, front to back. If you aren’t sure which direction you will be facing, you can do this test in both room orientations. You can use tape, string, or a laser to create the line on the floor.

Step 3: Post-it Notes or tape
Place a Post-It Note or strip of painter’s tape on the floor along the line of your string every 6 inches (15cm). Yes, it is a lot of Post-It Notes, but moving 6” forward or backward can make a massive difference, especially if your room is not acoustically treated.

Step 4: Place a speaker or sub in the front corner of your room
Now, you might be thinking, “isn’t that the worst place to put a speaker? Well, usually it is, but our goal here is to excite the room modes as much as possible and to make any imbalances in the room easy to identify. By placing the speaker directly in the corner on the floor, we can amplify the distortions caused by the room modes and ensure we are not hearing dips or peaks caused by speaker boundary interference (SBIR) from the floor, side or front wall.
Step 5: Cue up your three favorite reference tracks or pink noise
I like to use a wireless mouse to control my computer or keep my laptop in my lap so I can easily listen to the same parts of the songs from different positions in the room.
Step 6: Take a seat - you’re ready to start listening!
Be sure to keep your ears at the same height they’ll be when you are mixing, producing, or listening to music! Keep your chair centered on your string.

Step 7: Hit play and listen critically
While playing either songs you’re familiar with or pink noise, sit in a chair (ideally with wheels) and slowly move from the front of the room to the back of the room along the center line you created earlier.
As you are moving across your room, pay close attention to how balanced the low end is. Make mental notes of how things change and where you are in the room. Keep in mind you are not necessarily listening for where things sound the most exciting but the most balanced. We are looking for relatively consistent volumes across the frequency spectrum, NOT big dips or peaks (see the green line below for an example of a consistent volume).

Step 8: Make your marks
Mark the most balanced-sounding locations with a piece of tape or by writing an ‘X’ on the Post-It note. The Post-It note method is so powerful because it allows you to quickly compare two or three spots in a very controlled manner. If Spot C is more balanced and consistent, then spots A and B pull up their Post-Its and continue your critical listening.

Step 9: Narrow it down
With your options narrowed, go back and listen again, quickly comparing each location - speed is important here as we have terrible auditory memories. As you move through the room on your second, third, and fourth passes, start pulling up the Post-It Notes at the most imbalanced spots in your room.
After a few passes, you’ll only have a couple of Post-It Notes left on the floor.
Listen again to your last few spots taking your time to really pay attention to the subtleties between them.
Step 10: Finish up and enjoy your listening spot!
Using all the marks you made, identify the sweet spot where your low end is the most balanced. Once you’ve identified the location with consistent and balanced bass, not too much or too little sub-energy, and no massive holes, you have found your listening position! Tear up all of the other Post-It Notes and make a note of your listening position unless you want to leave a Post-It Note on your floor forever.
What to Listen For - A Key for Your Ears:
•Punch
•Evenness
•Balance
•Pressure (volume changes from note to note)
•Clarity between the kick and bass
•Low end transient response
•Are things too tubby or flabby sounding?
•Big pressure changes in the low end - it will amaze you how wild some spots in your room sound.
•This is particularly noticeable with bass lines - they should be even without massive volume changes from one note to the next.
•Kick drums should have punch and weight without too much or too little sub-energy - can you feel the impact in your gut?
What’s Next?
You’ve just completed the first major step in making your room sound great!
Next up comes adding acoustic treatment to your room and placing your speakers so make sure to be on the lookout for our next article covering everything you need to know about speaker placement!
Thanks so much for reading. If you need a hand improving the acoustics in your room, be sure to fill out our Free Room Advice Form to get free tailored acoustic treatment designed for your room.